Hallo my name is Dhea Damayanti R, I'am a student STT-PLN Jakarta and I majored in informatics engineerin,
So I will give tips and tricks about technology, hopefully useful...
Get your head round the cloud: 24 tricks for DropBox, iCloud and more
Tips, tricks and shortcuts to improve your grasp of OneDrive, iCloud, DropBox and Google Drive
iCloud
1. Secure the cloudTwo-step verification is one of the most effective ways of keeping your data secure. When activated, you must input both your password and a randomly generated code provided by Apple any time you make changes to your Apple ID or make purchases from a new device. To activate, sign into your Apple ID in your web-browser, click Password and Security and follow the on-screen instructions.
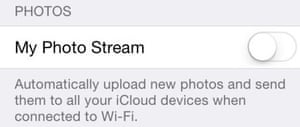
If you don’t feel secure enough with your private photos on iCloud even after you’ve enabled two-step authentication, here’s how to make sure your photo stream is never uploaded to Apple’s servers in the first place. On iOS 8 go to Settings > iCloud > Photos and deselect “My Photo Stream” and “Photo Sharing”.
3. Back it up
Thanks to the cloud, it’s possible to automatically backup your pictures, accounts, documents and settings when your iPhone or iPad is plugged in, locked and connected to Wi-Fi. On iOS 8 go to Settings > iCloud > Backup and turn on iCloud Backup. You can even delete some of your local files, such as pictures, to save space on your device.
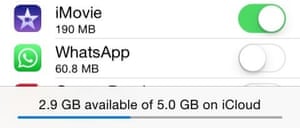
Save space by turning off backup storage on applications you rarely use or do not need backed up on the cloud. For instance, it’s important to backup your contact list, but do you really need to backup your whatsapp chat logs? On iOS 8 go to Settings > iCloud > Storage > Manage Storage > Your iPhone > and select which apps you wish to backup.
5. Google contacts to iCloud
Easily migrate your Google contacts over to iCloud by logging in to your Gmail account, clicking the red Gmail text just above the red compose button on the left-hand side of the screen and selecting contacts. Now click the “More” button in the toolbar at the top and select “Export”. A new window will emerge, select the contacts you wish to save and export as a vCard format. Log into your iCloud account on your computer and drag and drop the exported vCard into your Contacts folder. To see these contacts on your iOS device head to Settings > iCloud and ensure “Contacts” is enabled.
6. Go off-grid
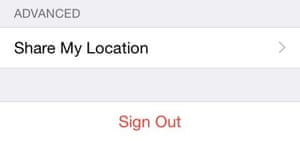
Hate iCloud and everything it stands for? It’s OK, you don’t have to use it. On iOS 8 go to Settings > iCloud and select Sign Out. You can still back up all of your data, except you’ll have to do it the old fashioned manual way by actually plugging your Apple device into your computer and backing up via iTunes.
Google Drive
7. Store any fileYou don’t just have to store specific Google files on Drive. If you download the desktop app it will create a folder in which you can drag and drop any file you like. Want to transfer a bunch of Word files, mp3s or even a video from one computer to another, but you don’t have a dongle to hand? No problem, just use Google Drive.
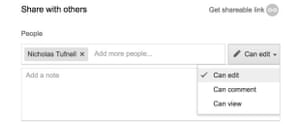
Google Drive allows you to make your document public, private or available to a select few. Click the blue share button in the top right corner of your document and type the names of the individuals you’d like to share it with under “Share with others”. If you want to create a public link, click the small chainlink icon in the top right corner.
9. Defend your Drive
Google has it’s own two-step verification - in fact it was one of the earliest adopters of the system - and it’s a breeze to use. While logged into your Google account, click your name in the top right corner then click Account > Security and under “Password” click the option to enable two-step verification before following the on-screen instructions.

You can use the power of the cloud to essentially bypass the 25MB limit that Google imposes on all Gmail accounts. After you have created both a Gmail and a Google Drive account (both are free), click the “Insert files using Drive” button at the bottom of your Gmail compose screen. Congratulations, you can now attach up to 10GB of data.
11. Know your shortcuts
You may not know it, but Google Drive comes with a whole list of incredibly useful shortcuts to help speed up and streamline your experience with the software. Simply type “Ctrl+/” if you’re on a PC or “Cmd+/” if you’re on a Mac in any area of Google Drive and a black screen will pop up, listing all of the helpful commands available.

12. Apps and add-ons
If you’re not using apps and add-ons, you’re not getting the most out of Google’s cloud service. Add-ons can be found in the top bar of any drive document you are editing and apps can be found on the Chrome webstore. These additional extras add extra functionality to Google Drive, including useful must-haves like track changes or PicMonkey, a free photo editor.
Dropbox
13. Offline viewingSometimes you can’t always stay connected to the cloud, which means you can’t access your documents. However, if you favourite your files in Dropbox while using a mobile device, they’re not only added to a special “Favourites” folder - sort of like a bookmarks folder - but they’re also saved locally, allowing you to access them even when you can’t connect to the cloud.
14. Secure your box
Dropbox has its own two-step verification system that will keep potential hackers at bay. To turn it on, go to the Dropbox website, sign in, click your name in the top right corner and select “Settings”. Then navigate to “Security” and enable the option that says “Two-step verification”. Although it can initially be a nuisance, this is the best way to keep your account significantly more secure.

Dropbox’s selective sync feature allows you to save space by syncing only a list of specific files to the machine you’re working on. Click the Dropbox icon on the menu bar in the desktop version of the software, click the gear icon and navigate to Preferences > Account > Selective Sync > Change Settings. Now select the folders you would like to sync.
16. Share with anybody
Dropbox allows you to share files with non-Dropbox users. To do this, sign into the Dropbox website and hover over the file or folder you wish of your choosing before clicking the chain link icon on the right of the screen. If you upgrade to Dropbox Pro you can add expiration dates as well as password protection for specific links.

Gain an extra 17.5GB worth of storage without paying a penny! Simply head over to dropbox.com/getspace and take advantage of the options availible. For instance, for every friend you refer, you’ll get an extra 500MB, with a 16GB cap. Connecting your Twitter and Facebook accounts will also provide you with a tidy 125MB of space each.
18. Self-destructing files
Specifically advertised to work with Dropbox, Digify is a handy little tool that will cause your files to self-destruct after a certain period of time or shortly after they have been opened, à la Mission Impossible. Download the app on your phone, sign in with your Gmail account, select Dropbox at the home screen, select the file you wish to send and then select the lifespan of the file after it has been opened before finally sending it to your desired recipient.
19. Find my Dropbox
If you have Dropbox installed on your laptop and that laptop gets stolen or lost, there’s a good chance you can use Dropbox to approximately locate the device. If Dropbox is set to turn on when your system starts, it will log the IP address and country in which your device was opened. To access this, simply head to Dropbox.com, sign in, click your name in the top right-hand corner, select Settings > Security and look under “Sessions”.
OneDrive

If you have pictures within a folder on OneDrive, the thumbnail of that folder will cycle through the images inside. When browsing through your documents, this feature can become confusing and annoying. If you want to assign a specific image to a folder in order to easily locate it simply open one of the folders, find your desired image, right click it and select “Add as cover” from the menu.
21. Do the two-step
Just like iCloud, Google Drive and Dropbox, OneDrive has its own two-step verification option. Sign in to your Microsoft account and under Password and security info click “Edit security info”. Now click “Set up two-step verification” and follow the on-screen instructions. Yes, we keep going on about it, but it’s probably one of the most overlooked security features that everyone should have enabled.

Unlike some other cloud services, whenever you delete content with OneDrive it is placed in a recycle bin, where it will remain until you empty it, just like on a PC or Mac. So if you accidentally delete a file you can restore it by opening the bin in the lower left hand corner of OneDrive’s web interface, and selecting Right click > Restore.
23. Create a survey
If you’re looking for a quick and easy way to create a shareable online survey, OneDrive’s got you covered. Sign into your account on your web-browser and click the create button in the top left-hand corner. You’ll see a whole bunch of options, but the one you’ll want is called “Excel survey” click it and follow the simple on-screen instructions.
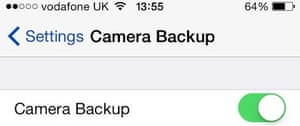
Automatically storing pictures on OneDrive with your mobile device couldn’t be easier. When you first install the app, it will ask you whether or not you want to automatically store your photos on OneDrive. However, if you didn’t get the message, tap the Settings button on the bottom right-hand corner of the app and press the button that says Camera Backup.
*ThankYou

Tidak ada komentar:
Posting Komentar